If you are experiencing issues with the receipt printer not printing out any receipts, but the buys are posting to the queue, restarting the printer usually fixes the problem. Follow these steps to restart the receipt printer:
Identify Your Printer Type
There are two types of printers that we have used in our BuyerKiosk configurations, and which printer setup you have depends on when the system was purchased. You can easily tell the difference between the two different printers by whether there is a TP-Link Nano Router attached to the back of the printer or not. This small "white box" is attached by Velcro to the back of the printer, and if you have it follow the instructions for PRINTER TYPE 1. If you do not have this device on your printer follow the instructions for PRINTER TYPE 2.
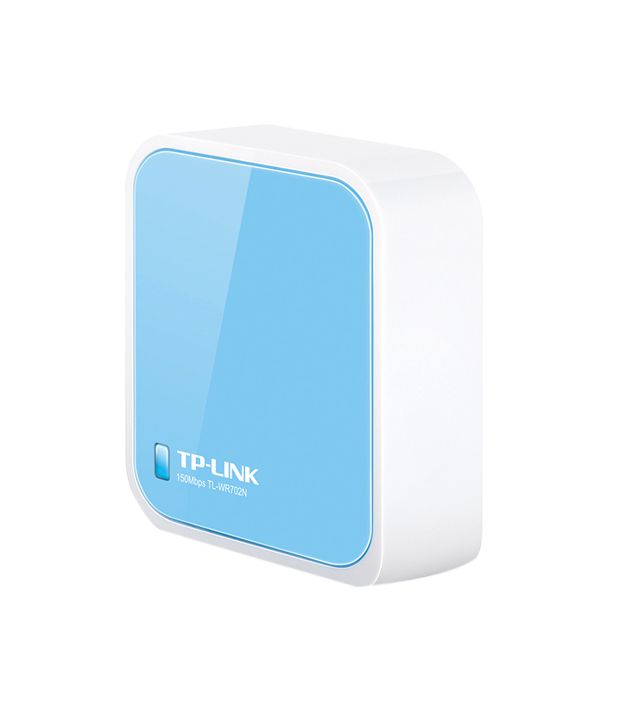
This is the TP-Link Device that will be attached to the back of your printer if you have TYPE 1.
Printer Type 1
If you have the TP-Link device attached to your printer, than restarting your printer involves powering off both the printer itself and the TP-Link device on the back and getting them in sync with each other. Follow these steps:
- Unplug the black micro-USB cable coming out of the TP-Link device (the "white box")
- Power off the printer itself by flipping the switch on the side of the printer to "off"
- Plug the black micro-USB cable back into the TP-Link device.
- Give the device AT LEAST 2-3 minutes to fully boot up and communicate with your firewall.
- Turn the printer back on by flipping the switch on the side of the printer back to "on"
- Proceed to the 'Final Step' below
Printer Type 2
If you do not have a TP-Link device attached to the back of your printer, than you just need to restart the printer itself by unplugging it from power for a few seconds. Find the power cord coming out of the printer and unplug it. After a few seconds plug the power cord back in. Once the power is back on wait until you see a solid (not blinking) ready light and proceed to the "Final Step" below.
Final Step
Once you have restarted the printer using one of the two methods above, we need to make sure the tablet is re-synced with the printer in case anything changed since the last time it was connected. Follow the steps below to re-sync the printers:
- If the BuyerKiosk App is not already running on the tablet, start the app and it should automatically re-sync the printers on start-up.
- If the app is already running go to the "Drivers License" input screen (usually by pressing the "English" button at the bottom if you are on the first screen).
- Tap the logo at the top of the screen seven times. This will prompt you to input a password.
- Enter "kiosk" as the password.
- Press "Update Printer Info" in the top right. This will re-scan the network for the printer(s).
- If successful it should say "Found X Printer(s)" (Where X is the number of printers you have in your store)
- Press "Submit" at the bottom.
- Press "Start Buyer Kiosk" at the bottom to return to the normal kiosk screen.
- Test to see if the printer is working by running a test transaction through the kiosk (you can use drivers license # 12345678)
Everything should be working now! If not then press the "Contact Us Directly" button at the bottom of this dialog to leave us a message.